Backgammon Strategy Guide
From your first opening roll to advanced doubling cube decisions — learn the strategies that separate casual players from consistent winners. Each concept includes interactive board positions you can play live.
Beginner Backgammon Strategy
Every strong backgammon player builds on the same fundamentals. These five concepts will immediately improve your game and form the foundation for more advanced tactics later.
Best Opening Moves
Your opening roll sets the tone for the entire game. Computer analysis (including rollouts by GNU Backgammon and eXtreme Gammon) has established the statistically optimal play for every opening combination. Here are the strongest:
 Play this position →
 Play this position →
 Play this position →
 Play this position →
 Play this position →
When no point-making move is available, prioritise splitting your back checkers (e.g. 24/23 with a 1) or slotting a key point you want to make next turn. Avoid moves that stack checkers uselessly on the 6-point.
The Key Points to Own
Not all points are created equal. Owning certain strategic points gives you a disproportionate advantage:
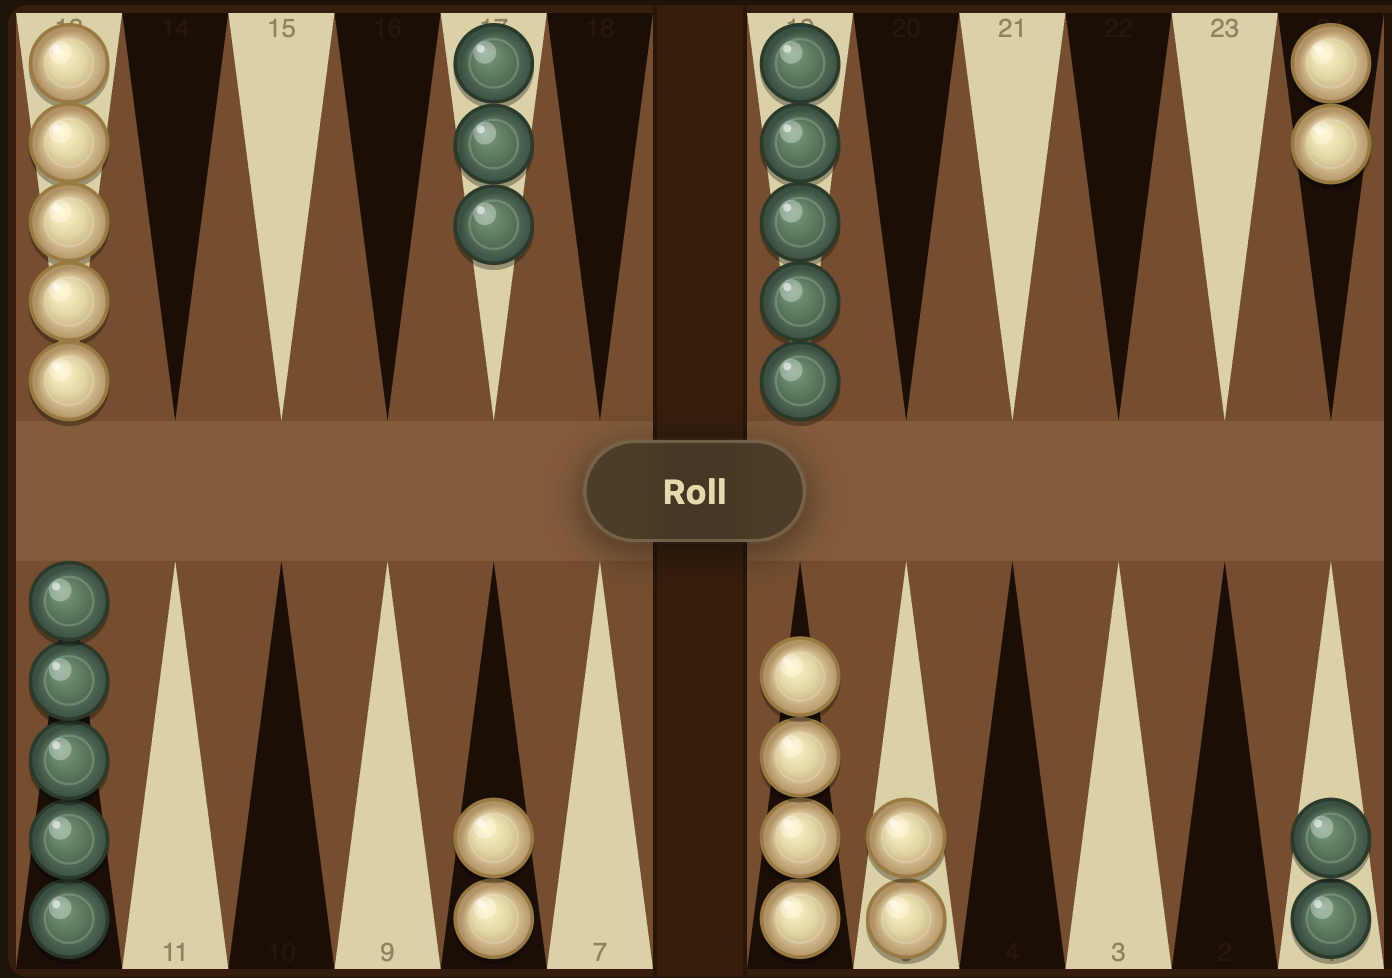
The 5-point (your own). The single most valuable point in the opening. It anchors your home board, blocks opponent runners, and serves as a foundation for building a prime. Make it at every opportunity.
The bar point (7-point). Combined with the 6-point and 8-point (which you start the game holding), the bar point creates a powerful three-point prime. Opponent checkers behind this wall need 8s or higher to escape.
The 4-point. Extends your home board prime. With the 5, 6, and 4-points held, your opponent re-entering from the bar must hit a 1, 2, or 3 — only half the possible entries.
The 20-point (opponent's 5-point). An advanced anchor on your opponent's side of the board. Also called the "golden anchor," it provides a safe landing spot for your back checkers and a launching pad for re-entering the game after being hit.
Play: Home board prime (4-5-6-7-8)The 20-point (your opponent's 5-point) is often called the "golden anchor". If you can't establish your own 5-point early, securing the golden anchor is the next best thing — it gives you a permanent safe haven deep in enemy territory.
Hit Probability & Blot Safety
Understanding how likely a blot (single checker) is to be hit is essential for making safe vs. aggressive choices. There are 36 possible dice combinations. Here's how many can reach each distance:
| Distance | Combos that hit | Probability | Key insight |
|---|---|---|---|
| 1 | 11 | 30.6% | Very dangerous — almost 1 in 3 |
| 2 | 12 | 33.3% | Worst single distance for a blot |
| 3 | 14 | 38.9% | Includes 1-2 combos hitting indirectly |
| 4 | 15 | 41.7% | High risk — includes double-2s |
| 5 | 15 | 41.7% | Same as 4, but no single-die hit |
| 6 | 17 | 47.2% | Most hittable distance — 6 appears on every die face |
| 7 | 6 | 16.7% | Big safety jump — indirect shots only |
| 8 | 6 | 16.7% | Same as 7 — includes double-4s and 6-2 |
| 9 | 5 | 13.9% | Relatively safe |
| 10 | 3 | 8.3% | Very few combinations reach here |
| 11 | 2 | 5.6% | Only 5-6 and 6-5 |
| 12 | 3 | 8.3% | Includes double-6s, 6-6 — never forget double-6 |
Within direct range (1–6 points away), your blot is hit roughly 30–47% of the time. Beyond 6 points, the danger drops to under 17%. When you must leave a blot, leave it far away — or leave it where getting hit matters least.
Understanding the Pip Count
The pip count is the total number of points (pips) your checkers must travel to bear off. It's the fundamental measure of who's winning the race.
At the start of the game, both players have a pip count of 167. Every move reduces your pip count by the die value used. Being hit adds pips (the checker returns to the bar and must re-enter from the opponent's home board).
When you're ahead in the race (lower pip count), your priority is to avoid getting hit and disengage from contact. Run your back checkers to safety and race for home.
When you're behind in the race, you need to maintain contact and create hitting opportunities. Keep anchors in your opponent's home board and look for shots. A single hit can swing a 30-pip deficit.
Count by point: multiply the number of checkers on each point by the point number. The starting position: 2×24 + 5×13 + 3×8 + 5×6 = 48 + 65 + 24 + 30 = 167 pips. Practise counting mid-game — knowing the race lead shapes every decision.
Bearing Off Efficiently
Once all 15 checkers are in your home board, the bear-off race begins. The goal shifts from position to pure speed:
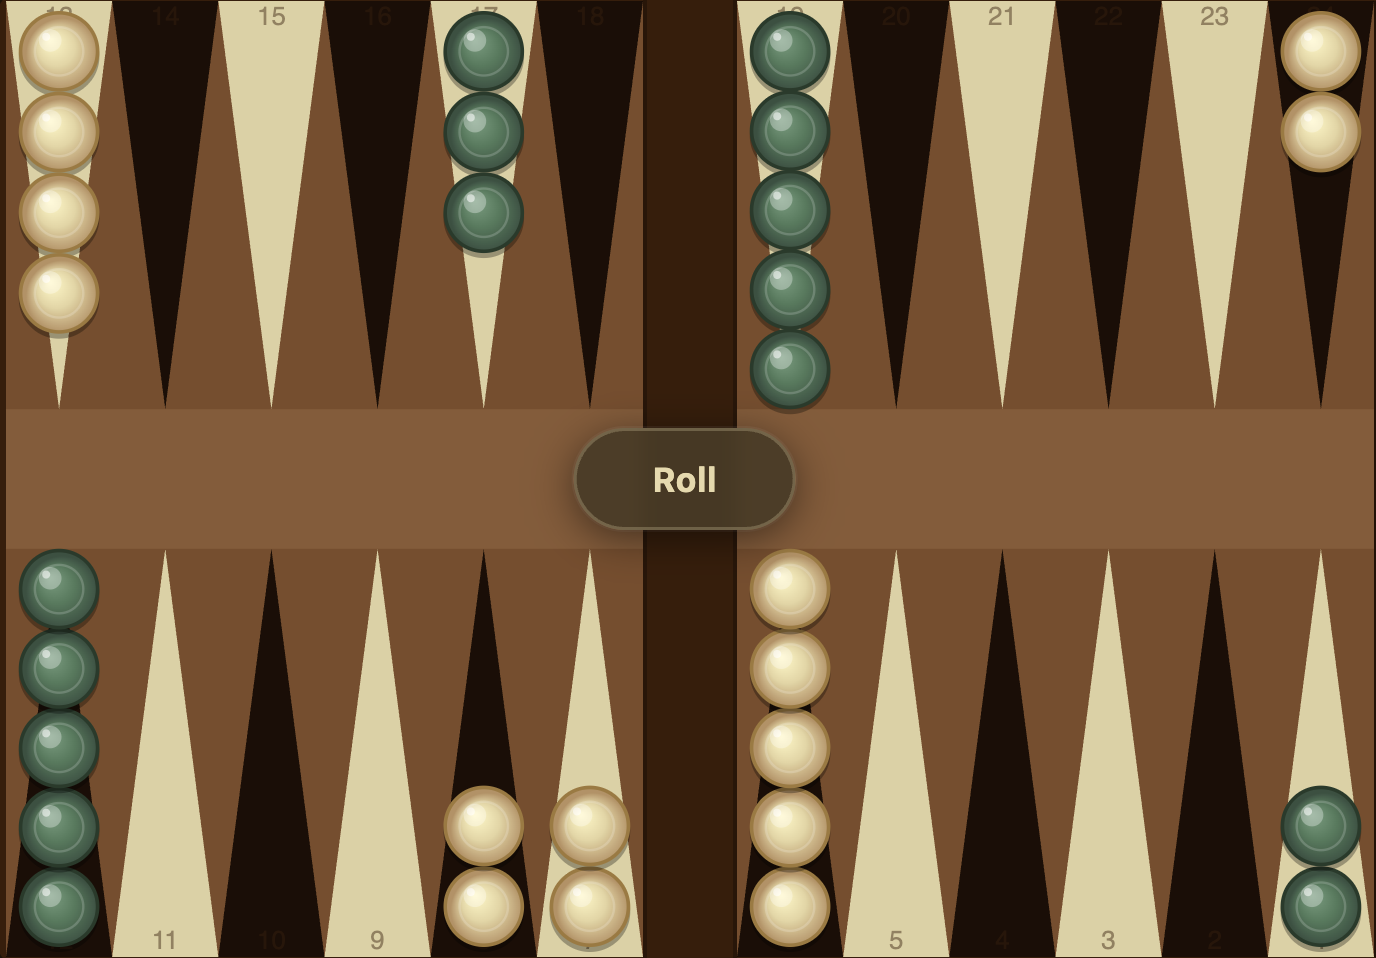
Spread checkers evenly. A distribution like 3-3-3-2-2-2 across your six home points bears off faster than 6-5-4-0-0-0. Even distributions mean fewer wasted pips on oversized rolls.
Avoid gaps on high points. Checkers stranded on the 5 and 6-points with empty lower points waste rolls. If you roll a 1 or 2, you can't bear off from the 5 or 6 — you just shuffle forward.
Keep a smooth position. Don't create "towers" of 4+ checkers on one point. They can't all leave at once, and they reduce the number of useful rolls.
Play: Ideal bear-off distributionAdvanced Backgammon Strategy
Once you've internalised the fundamentals, advanced strategy is about recognising game types and executing the right plan. Every backgammon position falls into one of several strategic categories. Knowing which game you're in — and adapting when it shifts — is what separates intermediate players from experts.
The Priming Game
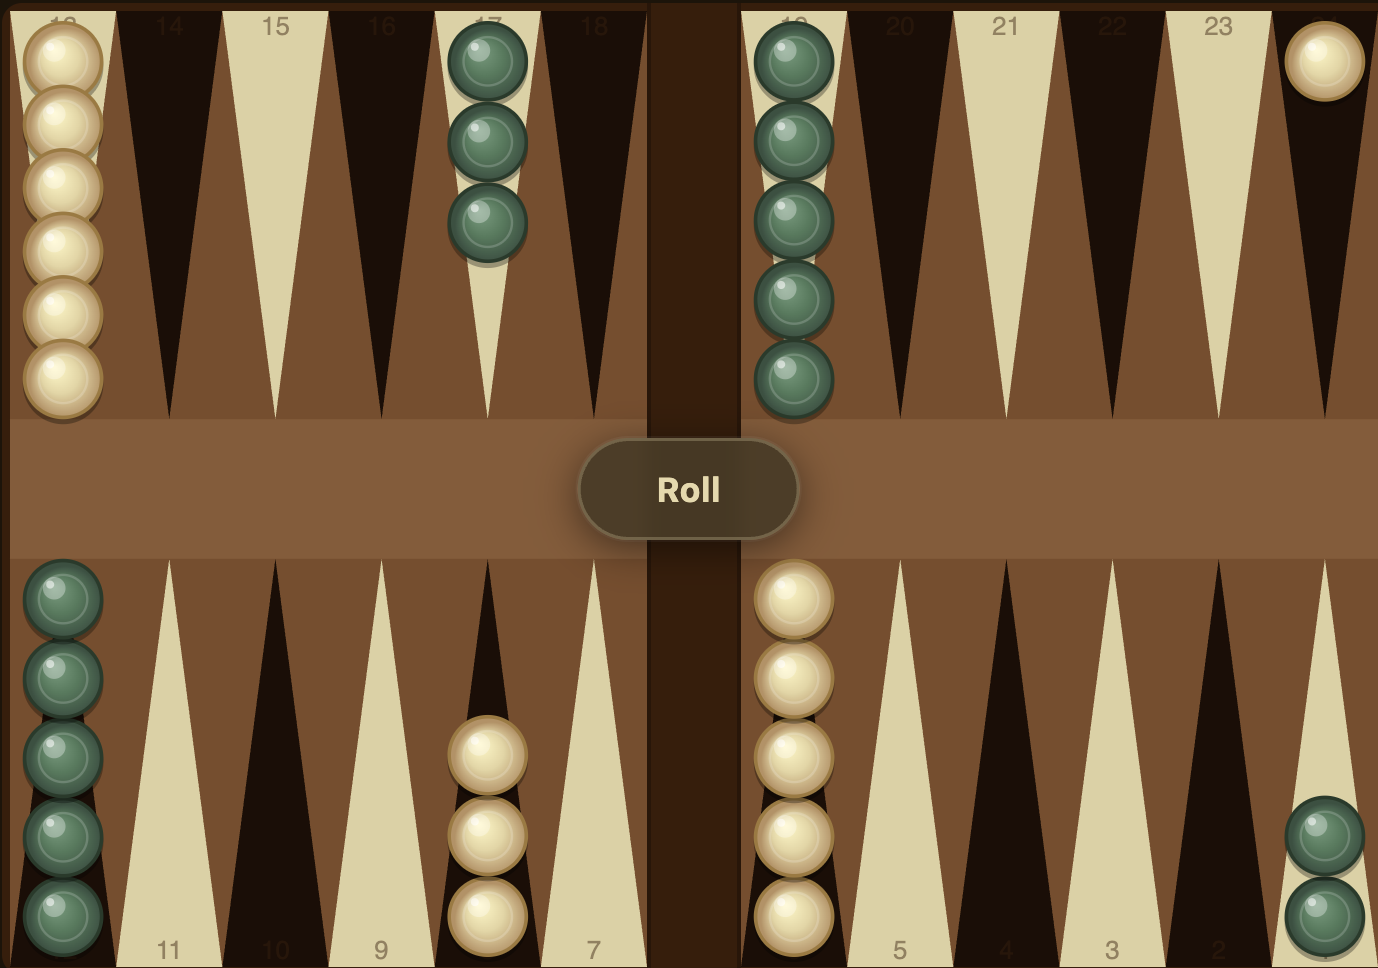
A prime is a consecutive row of blocked points, each held by two or more of your checkers. A four-prime is strong. A five-prime is dominant. A six-prime is the most powerful formation in backgammon — a checker trapped behind a full six-prime literally cannot escape until it breaks.
Building a prime. Start by securing the 5, 6, and bar (7) points — you already hold the 6 and 8 from the starting position. Then extend outward. The ideal prime runs from your bar point through your home board (e.g. points 3–4–5–6–7–8).
Maintaining a prime. The critical rule: never break a six-prime unless you have no legal alternative. Every turn you keep it intact, your opponent wastes a full turn with their trapped checkers. Move spare checkers on the leading edge of your prime instead.
Timing. The weakness of priming games is timing — you can run out of constructive moves and be forced to break your own prime. Keep "timing reserves": spare checkers in the outfield that can be brought forward without disturbing the prime structure.
Play: Six-prime trapping two checkersIn prime-versus-prime battles, timing trumps action. The player whose prime collapses first usually loses. Count how many non-destructive rolls each side has left — the player with more "timing rolls" has the advantage, even if they have fewer immediate threats.
The Blitz Attack
A blitz is an all-out attack on your opponent's checkers, aiming to hit as many as possible while rapidly closing your home board. The goal: keep multiple enemy checkers on the bar with no way to re-enter.
When to blitz. Look for these signals: your opponent has two or more blots in your home board quadrant, you've already made your 5-point or 4-point, and you have builders available on the 8 and 13-points to bring into action.
Executing the blitz. Hit every blot you can reach, even at the cost of leaving your own blots. In a blitz, the attacker's risk of being hit back is offset by the huge advantage of keeping the opponent on the bar with a closed (or closing) board. Each point you make in your home board reduces their re-entry chances by 1/6.
The closed board. If you close all six home-board points with enemy checkers on the bar, your opponent's turn is skipped entirely — they cannot re-enter. This can turn a tight game into a gammon or even a backgammon.
Play: Closed board blitz — 3 checkers on barThe Holding Game
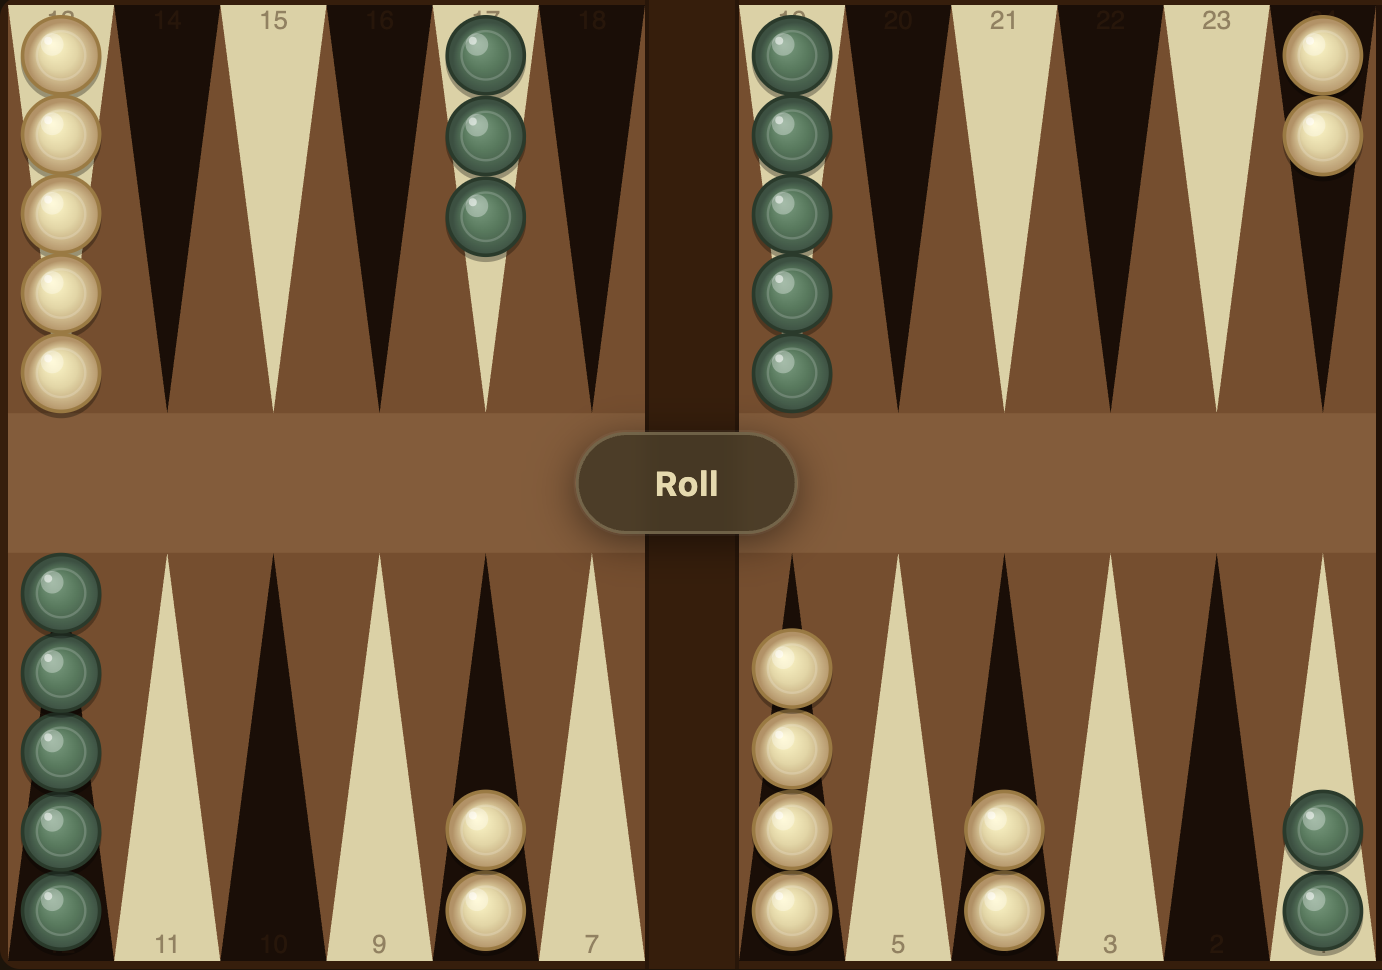
When you're behind in the race but not far enough behind for a back game, the holding game is your best weapon. You maintain an anchor — two or more checkers on a single point — deep in your opponent's home board, waiting for a shot.
Best anchors. The 20-point (opponent's 5-point) is the golden anchor — it's safe, central, and provides maximum return options. The 21-point (opponent's 4-point) is second best. Lower anchors (22, 23, 24-point) are progressively weaker because they're harder to escape from and generate fewer useful numbers.
The waiting game. While holding your anchor, advance your other checkers safely toward your home board. Your goal is twofold: (1) build a strong home board so that when you do hit a shot, the opponent struggles to re-enter, and (2) preserve the anchor until a favourable shot appears.
When to release. Don't abandon a good anchor for a marginal gain. Release it only when: you've pulled well ahead in the race, you've hit a key shot and need to escape, or your home board is strong enough that a hit would be decisive.
Play: Holding game with golden anchorThe Back Game
The back game is a last-resort strategy used when you're significantly behind. You deliberately hold two or more anchors in your opponent's home board, creating a web of potential shots while building your own home board for when you finally hit.
Best anchor combinations. The classic back game anchors are the 1-3 (ace-point and 3-point), 1-2, or 2-3 combinations. These positions maximise the number of dice rolls that give you a shot as your opponent tries to bear in. The 2-3 back game is considered the strongest because it covers the most entry numbers.
Timing is everything. The fatal flaw of back games is running out of timing — being forced to break your home board before you hit the shot you've been waiting for. Keep spare checkers in the outfield as long as possible. You want to hit the shot late, when your home board is fully made, not early when your board is still open.
The trap. Many beginners accidentally fall into back games by getting hit repeatedly. The key difference: a deliberate back game involves actively building your home board while maintaining two anchors. An accidental back game usually means your board is a mess and the anchors are a consolation prize. Don't play a back game unless your home board can punish the hit when it comes.
Play: 2-3 back game with strong home boardDoubling Cube Mastery
The doubling cube is what transforms backgammon from a dice game into a game of skill. Every cube decision is a proposition bet: "I believe I'm winning enough to raise the stakes." Mastering cube play can improve your results more than any other single skill.
The 25% take point. In money play, if your winning chances are above 25%, you should take a double. The math: passing costs you 1 point with certainty. Taking a 25% game means you win 25% × 2 = 0.5 and lose 75% × 2 = 1.5, for a net of −1.0 — same as passing. At 26% or better, taking is strictly better than passing.
The doubling window. You should double when your winning chances are approximately 70–78%. Below 70%, doubling is premature — you're giving your opponent the cube (and the right to redouble) too cheaply. Above 78%, your opponent should pass, so doubling is correct but you're not exploiting the window where they make a mistake by taking.
Woolsey's Law. The most practical doubling heuristic in backgammon: if you're not sure whether your opponent has a take or a pass, double. This works because the cost of doubling too early (giving up the cube) is usually smaller than the cost of failing to double when you should have (missing the whole game's worth of equity).
Gammon factor. When gammons are possible, the take point shifts. If you'll be gammoned 20% of the time you lose, you need better than 25% winning chances to take — closer to 28-30%. Conversely, if you're the one threatening gammons, you can double more aggressively because your opponent's effective take point is harder to reach.
Cube ownership value. Holding the cube has inherent value — estimated at roughly 3-5% extra winning chances. When you own the cube, you control the right to redouble, creating a "free roll" effect. This is why the optimal take point is slightly below 25% in practice.
Duplication & Diversification
These twin concepts are among the most elegant ideas in backgammon, and they're rarely taught to beginners — yet they influence nearly every move decision.
Duplication means arranging your blots so that your opponent needs the same numbers to execute multiple threats. If your opponent needs a 4 to hit one blot and a 4 to hit another blot, they can only hit one per turn. You've "duplicated" their good numbers. Without duplication, they'd need different numbers for each threat, increasing their total chances.
Diversification is the offensive mirror. When you need good rolls, arrange your position so that different numbers all accomplish something useful. If rolling a 3 lets you make a key point, rolling a 5 lets you hit a blot, and rolling a 1 lets you cover another blot — you've diversified your constructive numbers across many outcomes.
Practical example. You have a blot on your 4-point and your opponent has a checker on your 8-point. If you leave another blot on the 2-point, your opponent needs a 4 to hit either one (duplicated). But if you leave a blot on the 3-point instead, they can hit with a 4 or a 5 (diversified in their favour).
Duplicate your opponent's good numbers, diversify your own. This single principle explains dozens of seemingly mysterious plays that computers and grandmasters make. When evaluating candidate moves, count how many "good" numbers each side has — the move that minimises your opponent's useful rolls while maximising yours is usually correct.
Timing & Wastage
Timing in backgammon refers to having useful moves available in the future. A position with good timing has spare checkers that can be moved without damaging your structure. A position with poor timing forces you to break key points or pile checkers into inefficient stacks.
Wastage is the enemy of timing. Moves that "waste" pips — like bearing in from the 6-point to the 1-point instead of making a point — consume your timing reserves. Stacking five checkers on one point is wasteful because future rolls that land on that point have nowhere productive to go.
Recirculation. Being hit isn't always bad. In positions where you're running out of timing (your prime is about to crack), getting hit can be a gift — it recirculates a checker to the back of the board, giving you many more turns before you're forced to break your position.
Checkers in the zone. The "zone" is the area just outside your home board (points 7–12 for Player). Checkers in this zone can bear in over several turns, providing timing. Checkers already in your home board are committed — they must keep moving forward, using up timing quickly.
Match Play vs. Money Play
Most casual backgammon is money play — each game is independent and gammons double the stakes. Match play (first to N points) introduces entirely different strategic considerations because the score context changes everything.
The Crawford rule. When one player reaches match point minus one (e.g., 6-away/1-away in a 7-point match), the next game is played without the doubling cube. This "Crawford game" prevents the trailing player from immediately doubling to 2, which would otherwise be an automatic play.
Free drop. In the post-Crawford game immediately after the Crawford game, the leader can drop a double and still be at the same relative score. This "free drop" means the trailer should double immediately — and the leader should pass more aggressively than normal.
Gammon-saving vs. gammon-going. When you're ahead in the match, gammons become less valuable (you only need a few more points). When behind, gammons become extremely valuable (they're worth catching up two points instead of one). This shifts checker play: the trailer should play for gammons more aggressively, even taking bigger risks.
Match equity tables. Serious match players use match equity tables (METs) to calculate the take/pass threshold at each score. At 3-away/3-away, the take point is close to money-game levels. But at 2-away/4-away, the leader's take point shifts significantly because the stakes are asymmetric.